Features | Open Source | Releases | Docs | Try us free | Blog | Product
Projects within the platform: resources and user management
- Onesait Platform
This feature allows you to group users and share a number of resources with them. This feature is suitable for developing verticals in the platform.
It is important to note that only DEVELOPER and ANALYTICS users can create Projects.
1. Creating the Project
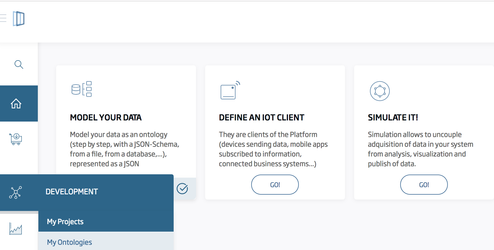
Go to /controlpanel/projects/list and click on Create, or click on the menu>DEVELOPMENT>My Projects.

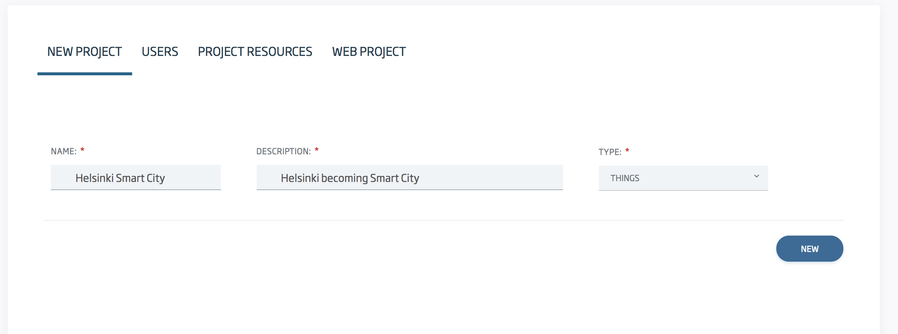
Before adding users and resources to the project, you need to create the Project, specifying: name, description, and type. Click on New.
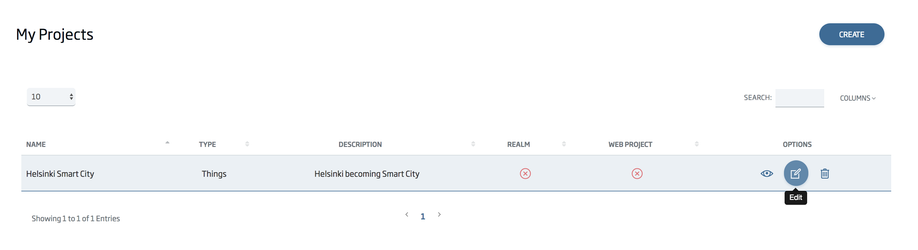
Once created, you will be redirected to Project list, and then you may click on Edit to start adding users and resources:
2. User management
In this section, we will be talking about the Users tab.
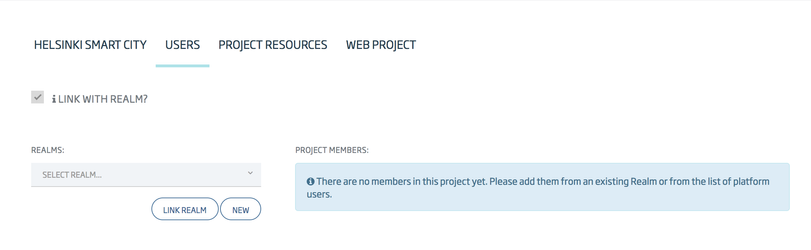
When adding users to the project, you can choose between importing users from an existing Realm, or straight from the platform itself.
Both are mutually exclusive. This means that a project cannot have platform users and Realm users simultaneously.
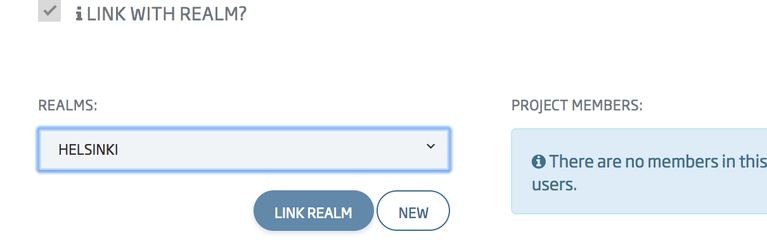
2.1 Linking a Realm and importing associated users
If you want to manage users in a project from a Realm, leave the checkbox checked, and select a Realm from the list and click on 'Link Realm':
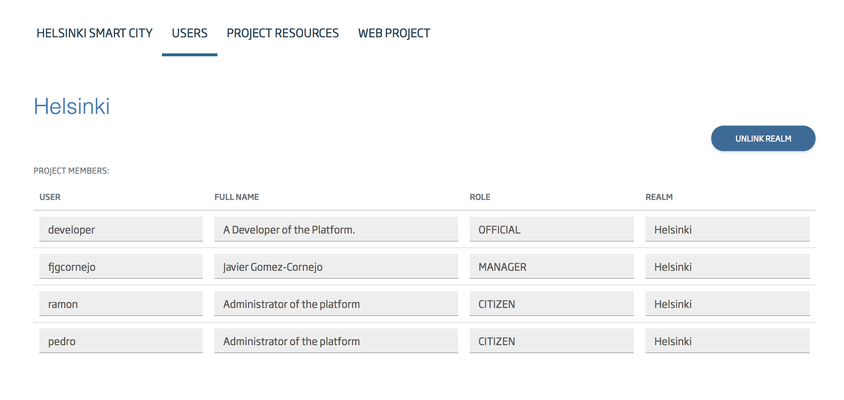
All ROLES and users associated with this Realm will be imported to this project:
Now you can start sharing resources.
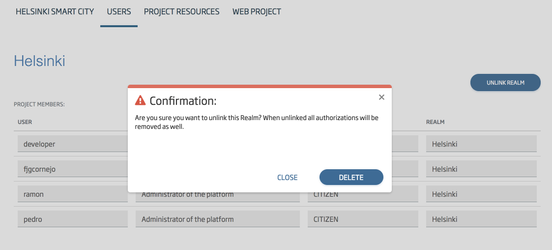
You can unlink the Realm at any time by clicking 'Unlink Realm', but if the resources are already shared, they will be removed!
2.2 Adding platform users
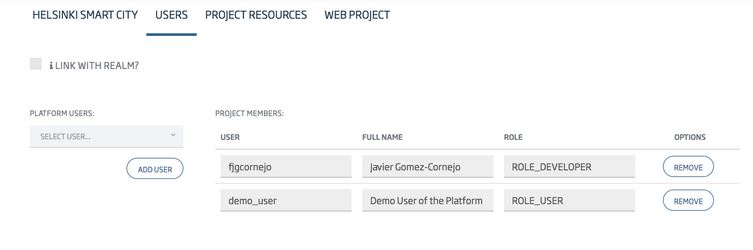
If you would rather choose to import users to the project from the platform, then uncheck the checkbox ('Link with the realm'). You will notice a new combo appearing.
Then, one by one, you will add users to the project:

If you ever want to link the project with a Realm instead, you have to remove current platform users first.
3. Sharing resources
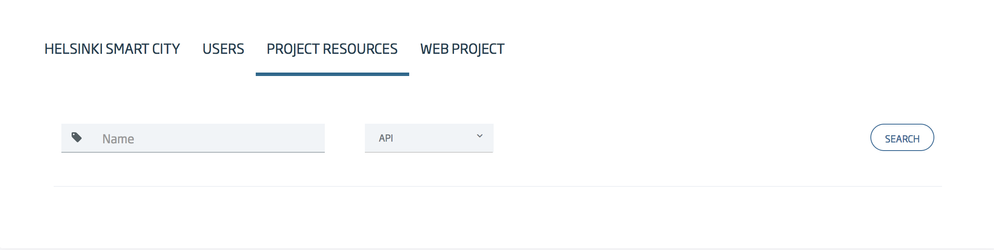
Go to the Project Resources tab.
Resources of types: ontology, device definition, digital twin device, gadget, dashboard, notebook, Digital Flow (node flow), and Api, can be shared within Project users, at different access levels.
Within a Realm
If the project is linked with a Realm, you can share resources per Realm Role.
Fill the input to filter resources by name, and then select the type of resource you want to search. If you leave the input empty, it will just return all existing resources of that specific type.
For example, let's add an Ontology:
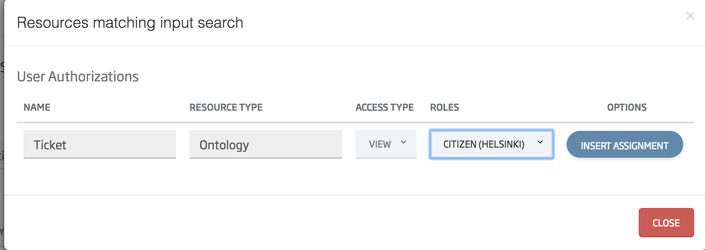
You can either assign VIEW access or MANAGE access to a Resource. As you start sharing resources, you will see that a list will appear beneath.
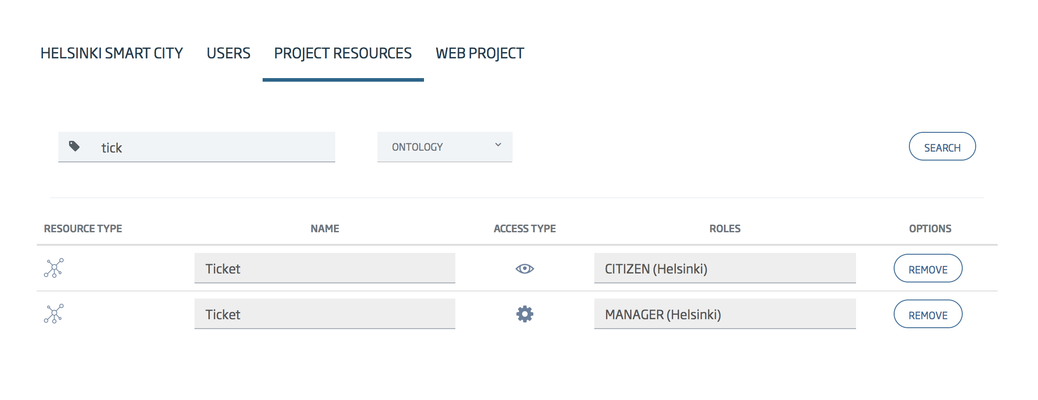
As you can see, all users whose Role is the one specified will have access to that Resource.
You can revoke authorizations at any time by clicking remove.
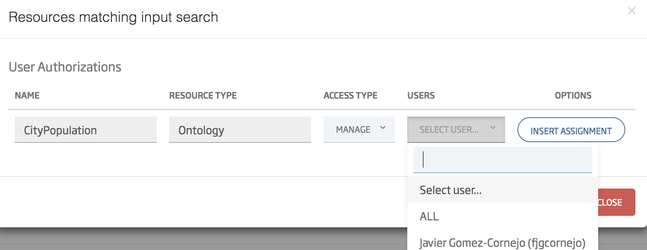
With Platform Users
If the project is not related to a Realm, the process is almost identical, except for the authorized Roles. Instead, you will be authorizing platform users who are project members.
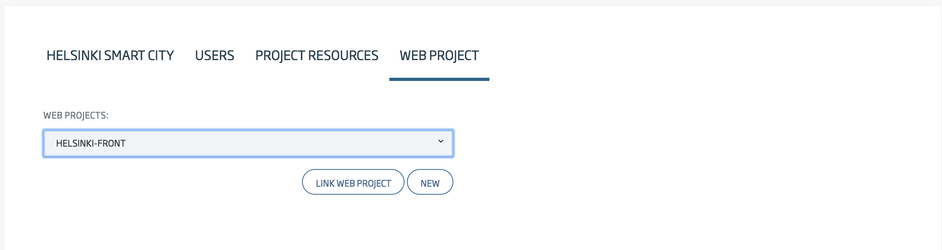
4. Web Project
You can have a web project related to the project itself. For example, if your team is going to develop a Front-end App, they can upload it to the platform, and then link it with the project.
5. Viewing the project as a project member
If you are a project member, you will see a new project in the project list (/controlpanel/projects/list)
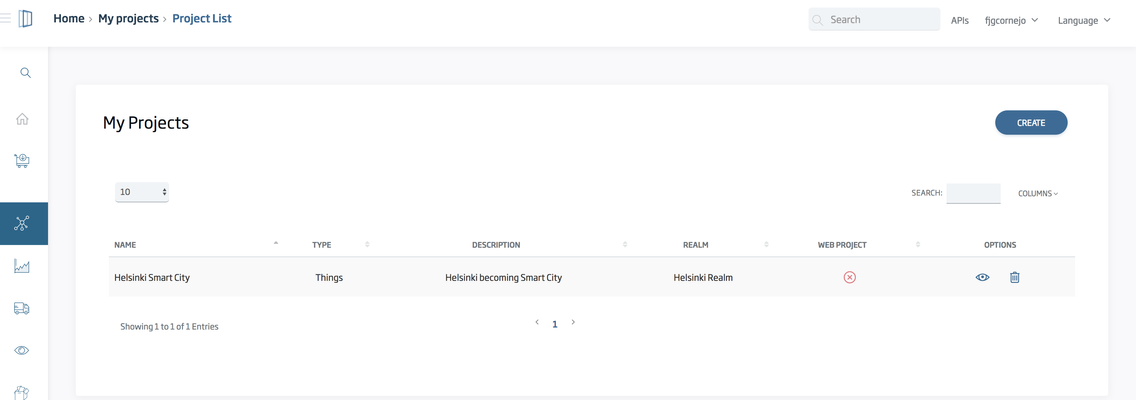
As you can notice, in this example I am a developer but I cannot edit the project, I am just a member. Once created, projects can only be managed by the creator and platform administrators.
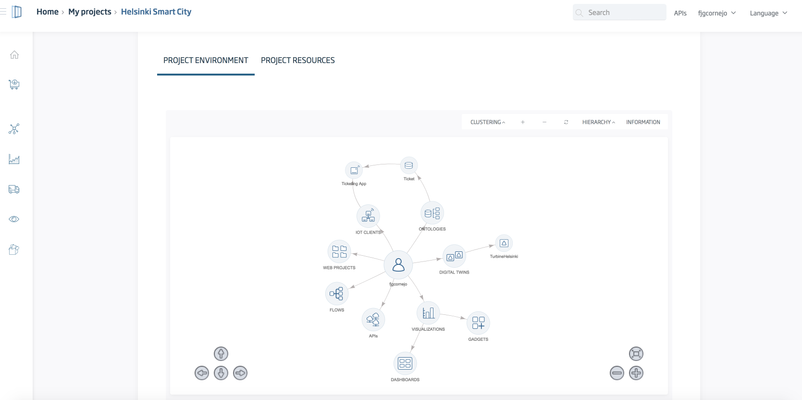
If you click on the eye icon, it will redirect to the Project view page.
In the first tab, you can see a graph similar to the one you see when you log in the platform. The main difference is that this graph is created exclusively from the shared resources of the project (shared resources available to the current user).
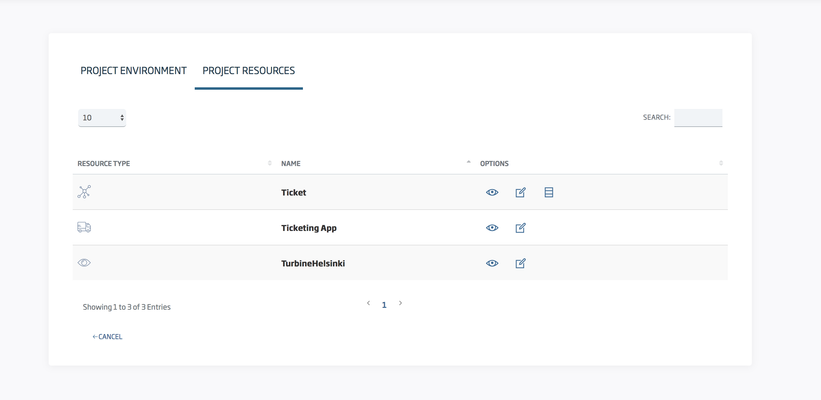
In the second tab, there is a list of the available project resources on which you have authorization.
Related content
![]()
(c) 2020 Indra Soluciones Tecnologías de la Información, S.L.U.