Features | Open Source | Releases | Docs | Try us free | Blog | Product
How to create a new Element managed by the Platform
In this post we are going to explain how to create a new element managed by the Platform. As a demostration we are going to create the concept of Model.
Add new entities to ConfigDB
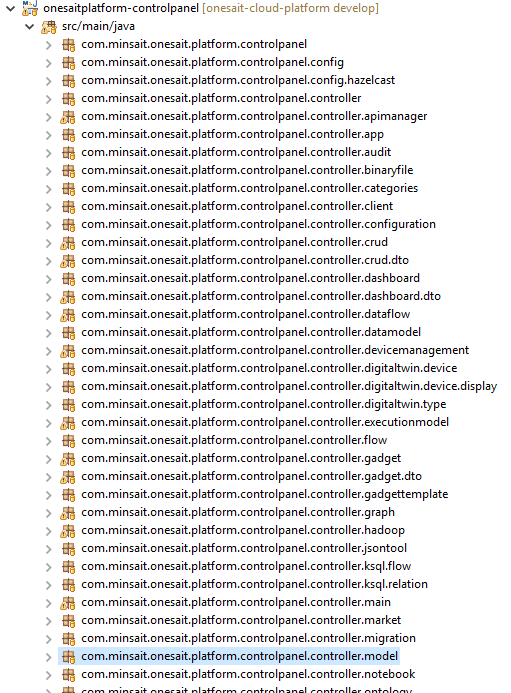
There is a module within the Platform where all the JPA Entities and JPA Repositories are created, its name is onesaitplatform-config-model:
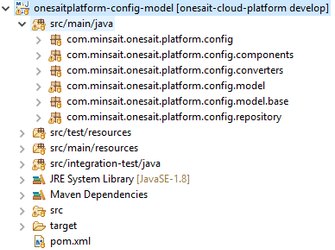
The entities are created in the package com.minsait.onesait.platform.config.model, so you have to create in this package a @Entity class Model.java:
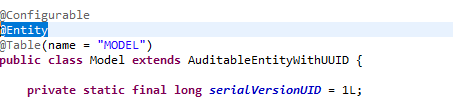
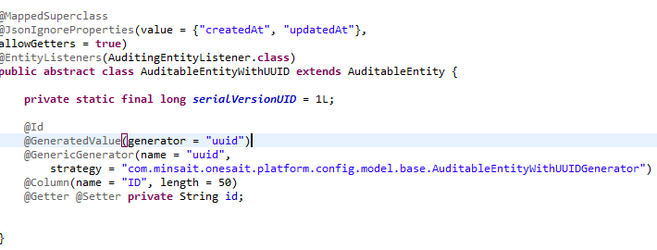
You have to add the @Table annotation, where is defined the name of the table, and it's also necessary to extends the class AuditableEntityWithUUID, where the self-generated ID field is defined:
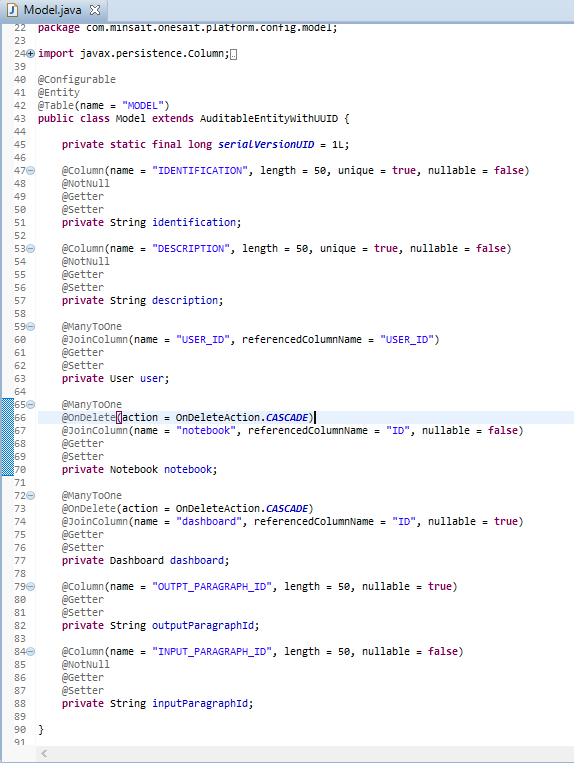
The next step is to define the fields of the entity. We will see a list of tags:
- @ManyToOne: to define the foreign keys, in this case we are using this tag for the fields 'user', 'notebook' and 'dashboard'.
- @JoinColumn: indicates that a given column in the owner entity refers to a primary key in the reference entity
- @NotNull: to specify that this field cannot be null.
- @Setter / @Getter: to generate setter/getter automatically.
We have already defined our JPA Entity, the next step is to define its corresponding JPA Repository. The JPA Repositories are defined on the package com.minsait.onesait.platform.config.repository, so you have to create in this package the interface ModelRepository.java and define the methods you will need:
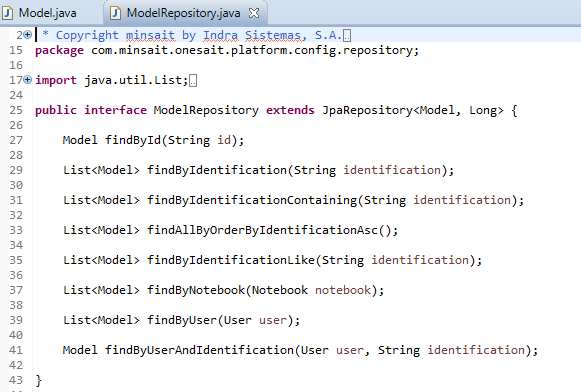
Don't forget to extends this interface of JpaRepository<Model, Long>
Finally, there is a module within the Platform that is in charge of creating and populating the tables on MySQL database defined on the onesaitplatform-config-model module, its name is onesaitplatform-config-init:
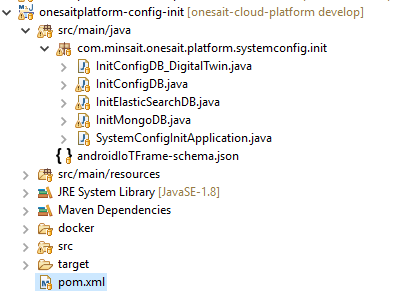
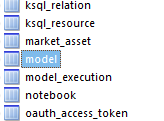
We have to execute the SystemConfigInitApplication.java as Java Application. If everything goes OK we can open the MySQL Query Browser and see our table created:
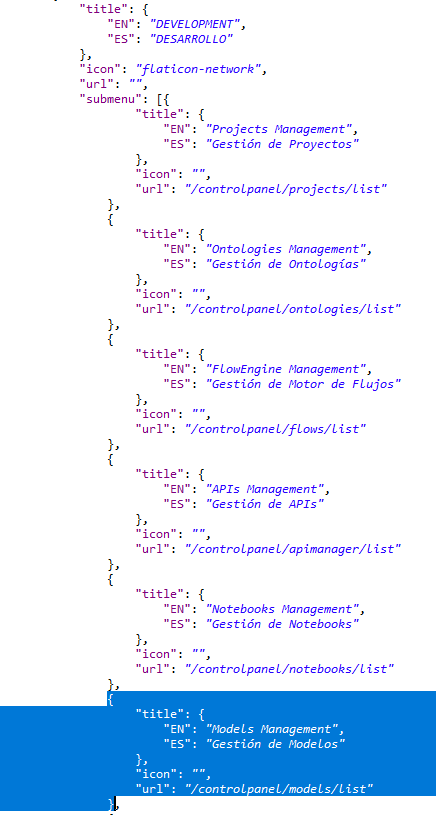
Add a new menu option
We are going to create a new menu option for this funcionality. The menu configuration is defined in a JSON file in the onesaitplatforn-config-init module.
Go to src/main/resources/menu
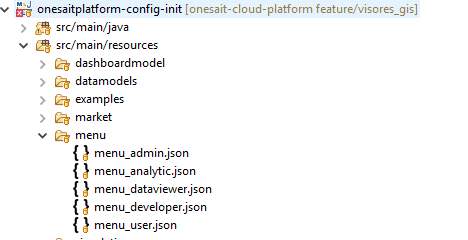
Here, we have a JSON for each role of the platform in order to each role has his own menu. We are going to add our submenu option to de Administrator role and inside of the menu 'Development'
We open the menu_admin.json and add the next code:
Finally, we have to execute the SystemConfigInitApplication.java as Java Application again.
Add the funcionality to the ControlPanel
Once the entities have been created, the next step is to add the funcionality to the ControlPanel. The ControlPanel is the module onesaitplatform-controlpanel, this module is in charge of managing the Model View Controller (MVC):
We'll create in this module the package com.minsait.onesait.platform.controlpanel.controller.model:
In this package we create the @Controller class ModelController.java
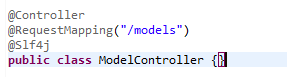
We are using the annotation @RequestMapping of Spring Web, this annotation maps HTTP requests to handler methods of MVC and REST controllers. We also use the annotation @Slf4j for log.
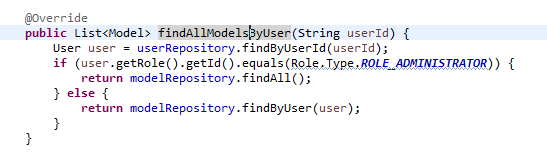
The method we are going to create is for listing all the models that the user has. The controller will need another class for doing all the business logic, for this, we will use the module onesaitplatform-config-service where we have to create the package com.minsait.onesait.platform.config.services.model and inside of it we are going to create an interface and its implementations where we'll define all the functions necessary to implement our new funcionality:

Let's starts creating a method on ModelController class for listing the models:

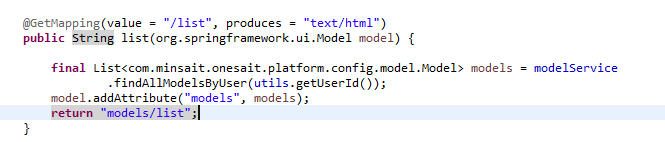
How you can see, we use the ModelService to get all the models of the user with the method 'findByUserId'. If we open the class thats implements the ModelService interface we'll see how to use the JPA Repository 'ModelRepository', that we created at the beginning, for getting the models:

Another important class is 'org.springframework.ui.Model', this class allows us to pass values to the front. In this case, we are passing the list of models to which the user has access:

In the method list of the ModelController class you can see that we return a string 'models/list', this is the HTML file where we are going to represent the list of models, so the next step is to create the front HTML page for listing all the models.
We create the folder models in src/main/resources/templates of the controlpanel module:
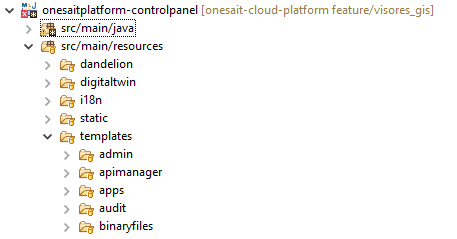
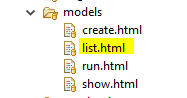
And inside of this folder, we create the file list.html
If you remember, we used the class org.springframework.ui.Model to pass the list of models from controller to the front part, and now we are going to represent them in the HTML file.
To create the HTML file we are going to use Thymeleaf.
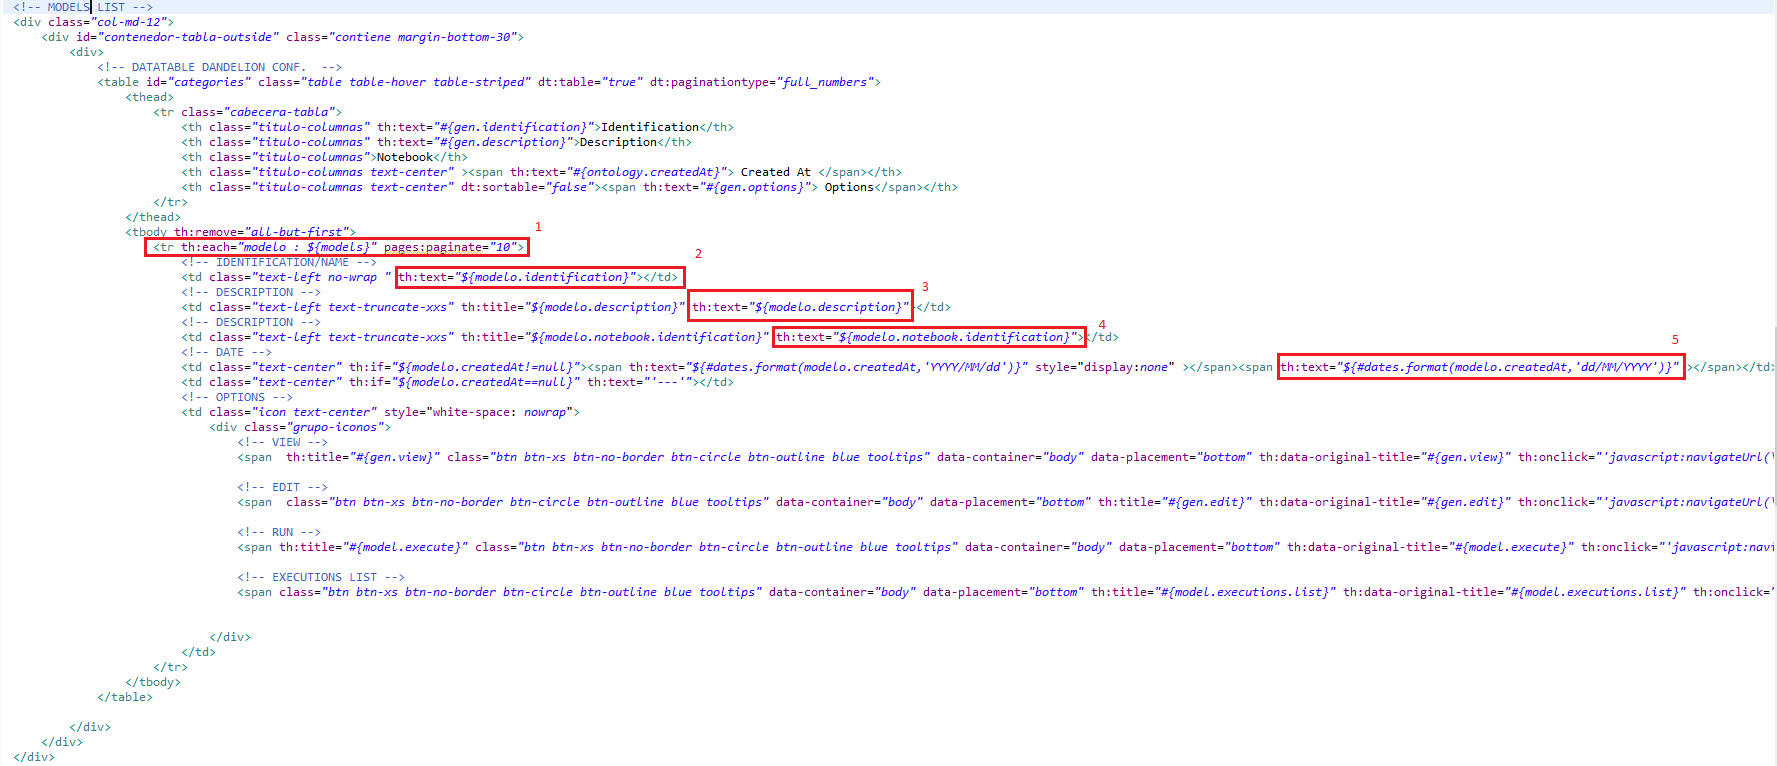
Let's analyze the previous HTML code.
- In number 1, we are saying that for each element of the models list, we are going to create a row in the table. You realize that we are using the ${models} annotation, that matches with the name we gave to the variable on the controller.
- In the next numbes, we are using one of the elements of the list of models and we are accessing their properties (identification, description...) to represent them in the corresponding columns.
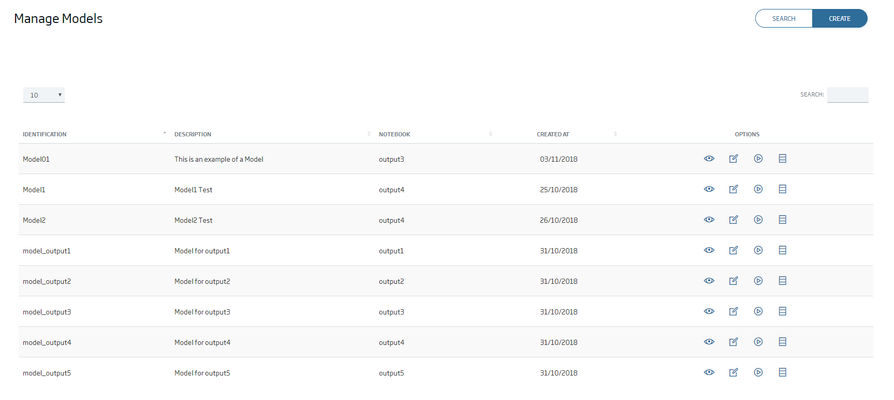
Now is the time to see what our table looks like, for this we have to start the controlpanel module.

We have to execute the ControlPanelWebApplication.java as Java Application. If everything goes OK we can see on the console something like this:

We access the URL http://localhost:18000/controlpanel/login and insert a valid user/password. Then go to the menu option that we are ceated, and we will see our table:
![]()
(c) 2020 Indra Soluciones Tecnologías de la Información, S.L.U.